Youth Volleyball Coaches: How to Teach the Underhand Serve | Video Guide Included
Four steps? Really? Isn't the underhand serve pretty... basic?
Well, yes and no.
It may be easy for YOU, as an adult, to hit the ball any which way you want, and still get it over. However, young athletes or players who are new to volleyball may not have the same understanding of how their body works like you do. I've seen a TON of attempts by 2nd and 3rd graders to get the ball over by chucking it in the air and taking a big swing at the ball, only to miss completely or hit someone's grandma in the stands who wasn't looking.
Spend 5 minutes at practice breaking down the underhand serve using these 4 steps, and you'll be on your way to a season full of successful serving! (Prefer to watch and learn? Skip to the Video Guide at the bottom!)
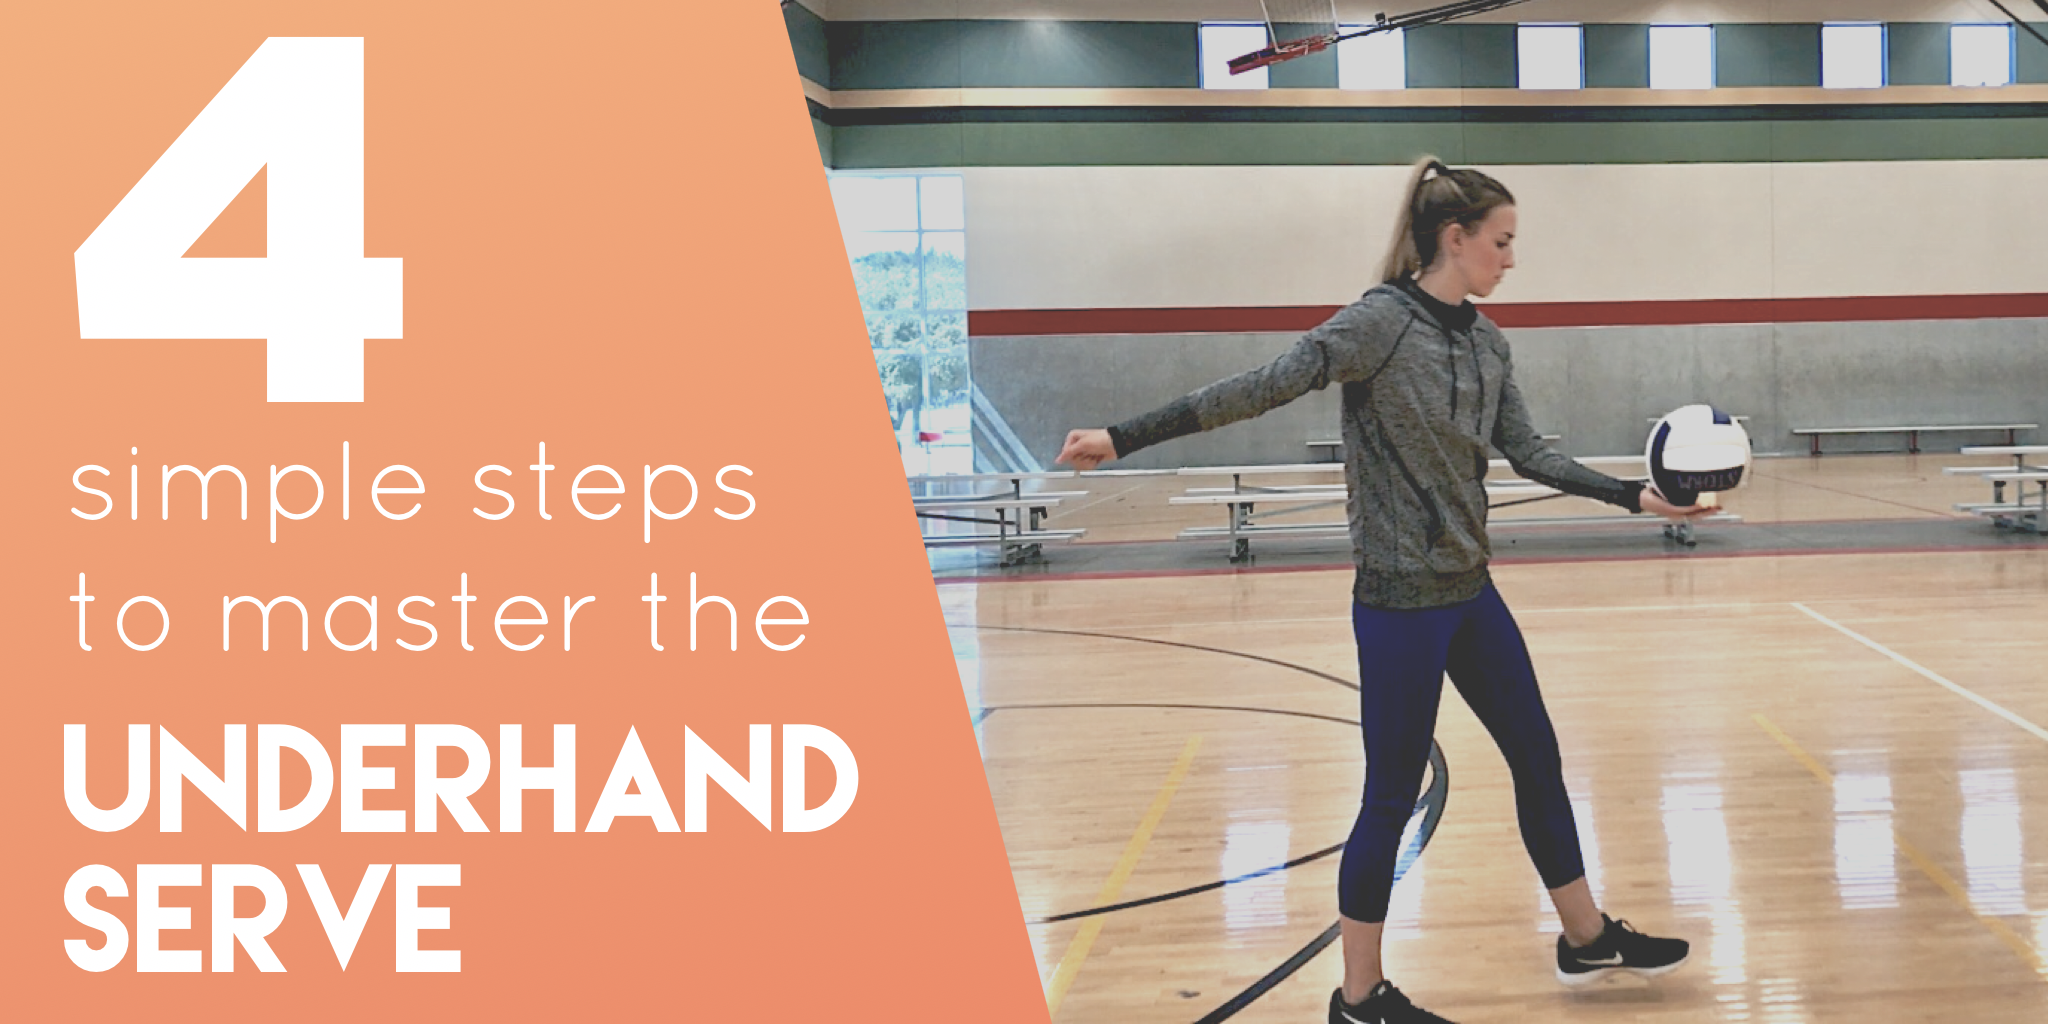
Step 1: The Rock
OK, for my instructions, I'm going to write as if we are teaching right-handed players how to serve. For the lefties on your team, just reverse everything.
For our stance, we'll start with our left foot forward, and our right foot back. The reason we want the left foot forward is to stabilize our body at the point of contact. Since we're swinging with the right hand, the left foot needs to be forward.
On occasion, children like to argue with coaches about this. They say it feels better to have their right foot forward. I don't understand why they argue with you, but it's wrong. lol. Don't second guess what you're teaching just because an 8-year-old is arguing with you.
Once we've got our proper stance established, we're going to rock back and forth, from back on our right foot, to forward on our left foot. This is to practice the transfer of weight from our back foot to our front foot. The weight transfer generates most of the power for our serve and is critical for smaller players to master.
Step 2: The Armswing
Alright, rocking back and forth seems pretty simple. Now we want to add our armswing. We're going to pretend to hold the ball in our left hand, and swing our right arm back as we step on our right foot, then forward to our left hand as we rock forward.
Practice this motion a few times without the ball. It should look fairly rhythmic for your whole team. Once it looks like everyone's ready to go, it's time to pick up a volleyball.
Step 3: Balance the Ball
We're not going to serve JUST YET. We want to make sure the players can balance the ball in their left hand as they're rocking back and forth, working on their armswing. They should lift their swinging hand just up to the base of the ball.
Notice how we are not practicing tossing the ball?
This is because adding a toss adds a ton of variable to the beginner player's serve, making the serve 10x more difficult than it needs to be. Hitting the ball out of our hand allows us to have a more consistent contact and reduces errors.
Step 4: Pop It (The Serve)
It's time to serve!
When we're finally ready to serve, we're going to use the phrase "rock and pop" to reinforce proper form here!
I like to have my players line up on the opposite side of the net from a partner for lots of reps (drill video here). We're going to do everything else we already practiced, but now we finally get to HIT the ball! All we want to do is just "pop" it. After we make contact, we're not taking a HUGE swing. We're just extending our arm a little past the ball to maintain control.
Let the players just go for it. The biggest issues will be balancing the ball, compromising form when going for power, and just contacting at the wrong angle. Walk around and help each player with their form, but if you broke it down as described above you should be good to go!